Essential Tools and Materials for Home Repair and Improvement
A well-stocked toolkit is crucial for any homeowner. Must-have tools include hammers, screwdrivers, pliers, tape measures, and power tools like drills and saws. Common materials range from lumber and drywall to adhesives and fasteners, ensuring you’re prepared for various projects.
1.1 Must-Have Tools for Every Homeowner
A basic toolkit should include a hammer, screwdrivers, pliers, tape measure, and a level. Power tools like drills and circular saws are essential for cutting and drilling materials. A wrench set, utility knife, and wire cutters are also crucial. These tools cover a wide range of tasks, from tightening loose fixtures to making precise cuts. Organize them in a sturdy toolbox for easy access and maintain a reliable work light for visibility during projects.
1.2 Materials Commonly Used in DIY Projects
Common materials for DIY projects include wood, drywall, and insulation for structural repairs. Fasteners like nails, screws, and brackets are essential for assembly. Adhesives such as glue, epoxy, and caulk are used for bonding and sealing. Paint, primer, and varnish enhance finishes. Sandpaper, drop cloths, and masking tape aid in preparation. Pipes, fittings, and roofing materials like shingles are vital for specific tasks. These materials ensure durability and effectiveness in various home improvement endeavors.

Safety Tips and Best Practices
Always wear protective gear like gloves, goggles, and a dust mask. Ensure proper ventilation when using chemicals. Keep tools organized to prevent accidents. Follow power tool manuals and unplug devices before maintenance. Maintain a first-aid kit nearby and familiarize yourself with emergency exit routes. Prioritize caution to avoid injuries and ensure successful project outcomes.
2.1 Precautions for Working with Power Tools
Always wear safety glasses and keep loose clothing tied back. Ensure tools are well-maintained and properly grounded. Avoid overreaching and keep work areas clean. Use the correct tool for the task and follow the manufacturer’s instructions. Keep children and pets away. Unplug tools when not in use or during blade changes. Maintain a firm grip to prevent loss of control and store tools securely after use.
2.2 Safety Gear for Various Repair Tasks
Essential safety gear includes gloves, goggles, and a dust mask. Steel-toe boots protect feet from heavy objects, while a hard hat is crucial for overhead work. Fire extinguishers and a first aid kit should always be nearby. Hearing protection is necessary for loud tools. Ensure all gear fits properly and is suitable for the specific task to minimize injury risks and ensure safe working conditions.
Foundation Repair and Maintenance
Regular inspections and proper drainage are key to maintaining a stable foundation. Addressing cracks and water issues early prevents major damage, ensuring long-term structural integrity.
3.1 Identifying Foundation Issues
Common signs of foundation problems include cracks in walls and floors, uneven surfaces, and doors or windows that stick. Inspect basements or crawl spaces for cracks in concrete or masonry. Look for horizontal or diagonal cracks, as they often indicate shifting or settling. Water damage, such as stains or puddles, can also signal foundation weaknesses. Regular inspections, especially after extreme weather, can help catch issues early to prevent costly repairs.
3.2 DIY Fixes for Minor Foundation Problems
For minor foundation cracks, use epoxy-based patching compounds to seal gaps. Ensure the area is clean and dry before application. For unevenness, shim placement under floors can stabilize surfaces. Regularly inspect and address water pooling near the foundation to prevent further damage. These fixes are temporary solutions; consult a professional for severe or recurring issues to avoid structural risks.
Walls, Windows, and Doors
Address cracks in walls with spackling compound and sand for a smooth finish. Fix sticking windows by adjusting frames and replace worn door seals for better insulation.
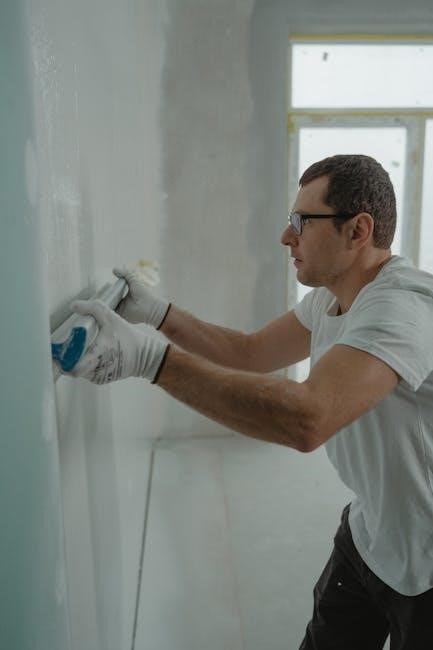
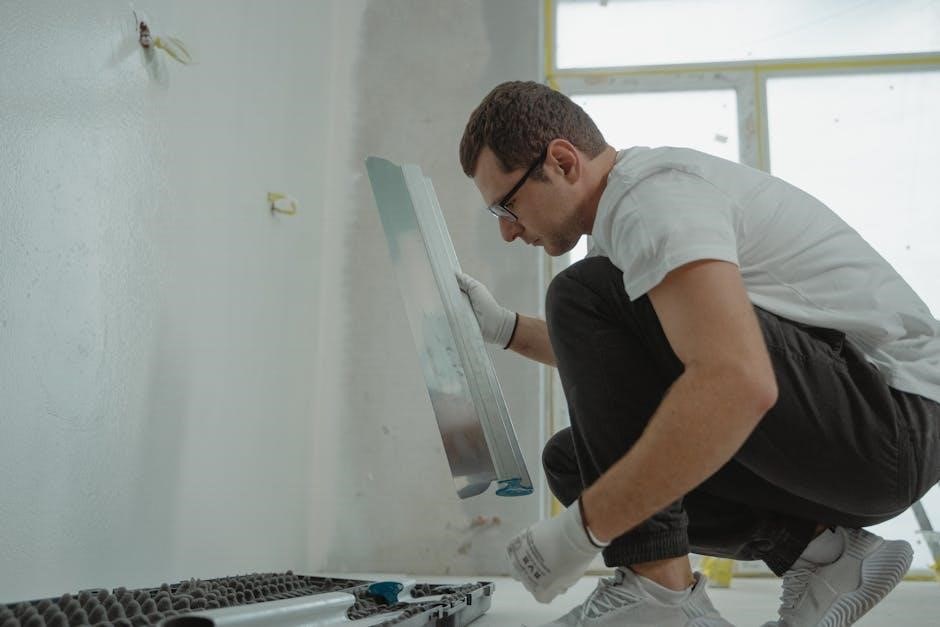
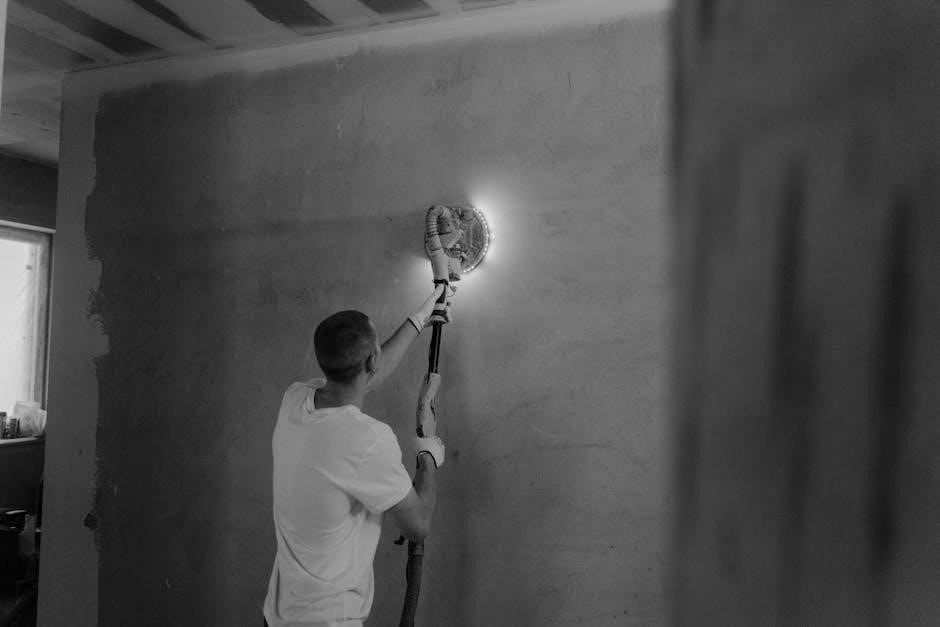
4.1 Repairing Cracks in Walls
Clean the crack thoroughly with a brush or vacuum to remove dirt and debris. Apply a spackling compound, pressing firmly into the crack. Let it dry completely before sanding smooth with fine-grit sandpaper. Feather the edges to blend seamlessly with the wall surface. For deeper cracks, apply multiple thin layers of compound, allowing each to dry before sanding. Finish by painting the repaired area to match the wall color.
4.2 Replacing Windows and Door Seals
Remove old, worn-out seals using a utility knife or scraper. Clean the area thoroughly with adhesive remover to ensure a strong bond. Measure and cut the new seal to fit perfectly. Apply the adhesive backing and press firmly to secure it. Use a roller or credit card to eliminate air bubbles. For weatherstripping, install it around door and window frames to ensure a tight seal and improved energy efficiency.

Plumbing System Repairs
Address common plumbing issues like leaks and clogs. Use essential tools such as plungers and drain snakes. Regular maintenance helps prevent major system failures and ensures efficiency.
5.1 Fixing Leaks and Clogs
Identify leaks by checking water meter or visible signs. Use plumber’s tape or sealants for minor pipe leaks. For clogs, employ plungers or drain snakes. Avoid harsh chemicals. Regularly clean drains to prevent buildup. Inspect hoses and connections for wear. Address issues promptly to avoid water damage and mold growth. Maintain a well-stocked toolkit for quick fixes. Consider professional help for persistent problems. Always turn off water supply before starting repairs.
5.2 Installing New Plumbing Fixtures
Shut off the water supply before starting. Use an adjustable wrench and bucket to catch water. Disconnect old fixtures carefully. Apply Teflon tape to threaded connections for a watertight seal. Tighten fittings by hand, then with tools. Ensure proper alignment and level placement. Test for leaks after installation. Follow manufacturer instructions for specific fixtures. Regularly inspect connections to prevent future issues. Keep a drain assembly handy for tubs and sinks.
Electrical System Improvements
Upgrade outdated systems for safety and efficiency. Install GFCI outlets in wet areas and smart home devices for convenience. Ensure proper grounding and circuit capacity. Hire licensed electricians for complex tasks to avoid hazards. Regularly inspect wiring and outlets to prevent fire risks. Consider energy-efficient LED lighting and automated controls for modern functionality.
6.1 Basic Wiring and Circuit Breaker Safety
Always turn off power at the main electrical panel before starting any wiring work. Understand circuit breaker functionality to prevent overloads. Use properly rated wires and connectors to avoid fire hazards. Test wires for live current with a voltage tester. Never bypass circuit breakers or use damaged cords. Follow local electrical codes and consult professionals for complex tasks to ensure safety and compliance.
6.2 Installing Light Fixtures and Outlets
Turn off power at the circuit breaker before starting. Use a voltage tester to confirm wires are de-energized. Mount fixtures and outlets securely, ensuring proper alignment. Connect wires according to color-coded standards. Follow manufacturer instructions for specific fixtures. Test installations to ensure functionality. Consider hiring a licensed electrician for complex or high-voltage tasks to guarantee safety and code compliance.
Heating and Cooling System Maintenance
Regular maintenance ensures efficiency, reducing energy bills and extending system lifespan. Schedule seasonal checks, clean filters, and inspect ducts for leaks. Professional inspections are recommended annually to ensure optimal performance and safety.
7.1 DIY HVAC Maintenance Tips
Regular HVAC maintenance boosts efficiency and prolongs system life. Change filters every 1-3 months, inspect ducts for leaks, and clean outdoor units from debris. Check thermostat settings, ensure proper airflow, and schedule professional tune-ups annually. Clean condenser coils and vacuum vents to maintain performance. DIY tasks like these can prevent costly repairs and enhance comfort year-round.
7.2 Upgrading to Energy-Efficient Systems
Upgrading to energy-efficient HVAC systems reduces energy bills and environmental impact. Consider installing smart thermostats, high-efficiency furnaces, or heat pumps. Look for systems with high SEER ratings for cooling and AFUE for heating. Programmable thermostats and zoning systems optimize performance. Transitioning to renewable options like geothermal or solar HVAC systems offers long-term savings and sustainability benefits for eco-conscious homeowners.

Roofing and Siding Repairs
Inspect roofs for damaged shingles and leaks; replace or repair as needed. Siding repairs involve patching holes and replacing warped panels to maintain structural integrity and curb appeal.
8.1 Fixing Roof Leaks and Damaged Shingles
Inspect your roof for curled, missing, or damaged shingles and replace them promptly. For leaks, identify the source and seal cracks or gaps with roofing cement. Ensure proper ventilation to prevent moisture buildup. Replace underlayment if necessary and secure loose shingles with roofing nails. Regular maintenance can prevent costly repairs and extend your roof’s lifespan. Addressing issues early prevents water damage and structural weakening.
- Inspect shingles regularly for wear and tear.
- Use compatible materials for repairs to maintain durability.
- Consider professional help for major or widespread damage.
8.2 Maintaining and Replacing Siding
Regularly clean siding to prevent mold and mildew buildup. Inspect for cracks, warping, or rot, and repair promptly. Replace siding when damage is extensive or rot is present. Choose materials like vinyl, fiber-cement, or wood based on durability and aesthetics. Ensure proper installation and sealing to maintain weather resistance. Regular maintenance extends siding lifespan and enhances curb appeal.
- Use a pressure washer or mild detergent for cleaning.
- Address gaps or loose panels to prevent water intrusion.
Flooring Options and Installation
Choosing the right flooring involves considering durability, aesthetics, and maintenance. Popular options include hardwood, carpet, tile, laminate, and vinyl. Select based on lifestyle and personal preference.
9.1 Choosing the Right Flooring Material
Selecting the ideal flooring material involves assessing durability, aesthetics, and maintenance needs. Hardwood offers timeless appeal, while carpet provides comfort. Tile is versatile and moisture-resistant, perfect for kitchens and bathrooms. Laminate and vinyl are budget-friendly options with realistic designs. Consider lifestyle, budget, and personal preference when making your decision for a practical and visually appealing solution;
9.2 DIY Flooring Installation Guide
Start by clearing the room and inspecting the subfloor for levelness and cleanliness. Measure the space to calculate material needs. Lay flooring according to manufacturer instructions, ensuring proper alignment and spacing. Use a chalk line to guide the first row. Cut flooring to fit around vents and obstructions. Secure planks or tiles firmly, applying adhesive if required. Finish by sealing the flooring and trimming edges for a polished look.
Kitchen Remodeling Ideas
Kitchen remodeling transforms spaces with modern designs, efficient layouts, and stylish finishes. Update cabinets, countertops, and appliances for a fresh look. Incorporate lighting, backsplashes, and storage solutions to enhance functionality and aesthetics.
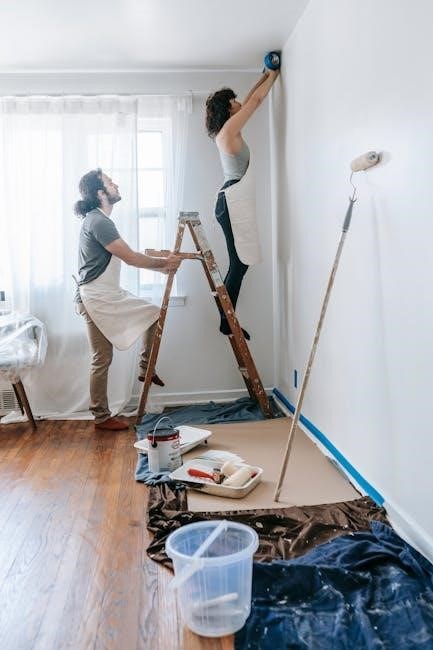
10.1 Budget-Friendly Kitchen Updates
Transform your kitchen without overspending. Paint cabinets, update hardware, and install new lighting for a fresh look. Refinish countertops instead of replacing them, and add a backsplash with affordable tile or paint. Declutter and organize to maximize space. Shop for second-hand appliances or discounted materials to stay within budget while achieving a modern, functional kitchen.
10.2 Modern Kitchen Design Trends
Modern kitchens emphasize minimalism, functionality, and sustainability. Open layouts, sleek countertops, and monochromatic color schemes are popular. Incorporate smart technology, like voice-controlled appliances, for convenience. Use eco-friendly materials, such as recycled wood or quartz, and energy-efficient lighting. Add statement pieces like a large island or pendant lights to enhance both style and usability in your contemporary kitchen space.
Bathroom Renovation Tips
Modern kitchens blend sleek aesthetics with functionality. Open layouts, minimalist cabinetry, and integrated appliances are trending. Incorporate materials like quartz countertops and wide-plank flooring for a contemporary look. Smart home technology, such as voice-controlled appliances, enhances convenience. Neutral color palettes with bold accents create a sophisticated ambiance, while large islands and pendant lighting add both style and practicality to the space.
11.1 Small Bathroom Makeover Ideas
Transform small bathrooms with space-saving solutions. Use light colors and mirrors to create a sense of openness. Install wall-mounted fixtures to maximize floor space. Opt for a pedestal sink or corner shower for a sleek look. Add storage with recessed cabinets or over-the-toilet shelves. Incorporate vertical elements like tall curtains or shelves to draw the eye upward, making the room feel larger and more inviting.
11.2 Installing New Bathroom Fixtures
Updating bathroom fixtures can modernize the space. Start by shutting off water supply and draining lines. Use a bucket to catch remaining water. Install new faucets, toilets, or showers by following manufacturer instructions. Wear protective gear like gloves and goggles. Ensure all connections are tight to prevent leaks. Test fixtures after installation to confirm proper function and water flow. Check local plumbing codes for compliance.
Landscaping and Outdoor Improvements
Enhance your home’s exterior with strategic landscaping and outdoor improvements. Incorporate plants, lighting, and hardscaping to boost curb appeal and create functional, beautiful spaces.
12.1 Enhancing Curb Appeal
Boost your home’s curb appeal with a well-maintained lawn, vibrant landscaping, and a clean exterior. Add seasonal flowers, trim shrubs, and ensure the front door and porch are inviting. Regularly power wash sidewalks and siding to remove dirt and grime. Consider updating house numbers and adding solar-powered lights for a modern, welcoming look that enhances your home’s first impression.
12.2 Building Outdoor Living Spaces
Transform your backyard into an inviting retreat by building functional outdoor living spaces. Start with a sturdy deck or patio, and incorporate seating areas, fire pits, or pergolas. Add lighting and landscaping to enhance ambiance. Use durable materials like wood, stone, or composite decking for long-lasting results. Consider adding an outdoor kitchen or dining area to create a space perfect for entertaining and relaxation.

Budgeting and Planning for Home Projects
Assess your needs, prioritize projects, and set a realistic budget. Plan timelines, gather materials, and consider contingency funds to avoid overspending. Create a detailed roadmap for success.
13.1 Estimating Costs for Repairs and Renovations
Estimating costs involves researching material prices, labor fees, and equipment rentals. Break down projects into components, compare supplier quotes, and use online cost calculators. Consider permits and inspections. Factor in a 10-20% contingency for unexpected expenses. Document all estimates and adjust based on project scope changes. Accurate planning helps avoid financial surprises and ensures smooth execution.
13.2 Creating a Realistic Project Timeline
Start by breaking down projects into smaller, manageable tasks. Assign realistic timeframes based on complexity, material availability, and labor. Consider weekends, holidays, and potential delays. Add buffers for unexpected issues. Monitor progress weekly and adjust schedules as needed. A clear timeline helps prevent rush jobs and ensures tasks are completed efficiently, maintaining quality and reducing stress.

Advanced DIY Projects
Explore complex DIY tasks like custom woodworking, smart home automation, and advanced renovations. These projects enhance functionality and aesthetics while challenging your skills.
14.1 Building Custom Storage Solutions
Creating custom storage solutions enhances organization and functionality in any space. Use materials like plywood, MDF, or reclaimed wood to craft shelves, cabinets, or drawers. Measure spaces carefully, plan designs, and execute with precision tools like circular saws and drills. Add finishes such as paint or stain for a polished look. Incorporate hardware like knobs or slides for smooth operation, ensuring durability and style.
14.2 Creating a Home Workshop
Setting up a home workshop requires careful planning and organization. Choose a well-ventilated space like a garage or basement. Install proper lighting, including overhead and task-specific options. Equip the area with essential tools, shelving, and a sturdy workbench. Ensure safety by storing materials securely and keeping fire extinguishers nearby. Add a vice and electrical outlets for convenience, creating a functional space for DIY projects and repairs. Proper setup enhances productivity and safety.

Resources and Further Learning
Explore online tutorials, DIY forums, and local workshops for hands-on experience. Utilize books, manuals, and courses to enhance your skills in home repair and improvement.
15.1 Recommended Books and Manuals
Essential resources include The Complete Guide to DIY Home Repair and Home Repair Wisdom by seasoned contractors. Black & Decker’s Home Improvement Guide offers detailed manuals for various projects. These books provide practical advice, step-by-step instructions, and visual guides to help homeowners tackle repairs confidently; Available at libraries or online retailers, they are invaluable for both beginners and experienced DIYers.
15.2 Online Courses for Home Improvement
Explore online courses on platforms like Coursera, Udemy, and LinkedIn Learning, offering tutorials on plumbing, electrical work, and woodworking. Websites like The Home Depot and Lowe’s provide free workshops and guides. These resources cater to all skill levels, ensuring homeowners can learn new techniques and enhance their DIY capabilities. Many courses are affordable or even free, making them accessible to everyone.